Cancel
Start searching
This search is based on elasticsearch and can look through several thousand pages in miliseconds.
Learn more

Note: If you are looking for an English instruction, please follow this link which will show you a README file containing similar information to this article: https://gitlab.pluspunkthosting.de/T3O/typo3.org
To be able to contribute to the site (typo3.org), you first need access to the code base. You can get this by contacting Thomas Löffler, preferably via Slack. If you don't have a Slack account yet, you can register here: https://forger.typo3.org/slack and then contact Thomas directly. After you have been activated, you can take care of a local development environment.
To participate in the development of typo3.org, we have provided a suitable Vagrant project at https://git.punkt.de. However, you will need Vagrant(https://developer.hashicorp.com/vagrant/install ) and VirtualBox(https://www.virtualbox.org/wiki/Downloads ) for error-free use. Vagrant saves you the trouble of configuring a local web server. Both Vagrant and VirtualBox can be downloaded and installed from the specified pages.
If you encounter problems during installation, this may be related to the versions of the software used. Our Vagrant box has been tested with the following versions:
If it is not possible for you to use these versions, e.g. because you are already using another Vagrant version, you are welcome to contact us via technik@punkt.de and we will see if we can find a solution.
To do this, clone our Git project from https://git.punkt.de and go to the folder created:
git clone https://gitlab.pluspunkthosting.de/T3O/typo3.org.git
cd typo3.org/
To start the VagrantBox, you only need to call the following command:
vagrant upThis downloads and starts the box and clones the typo3.org git project into the box once again. This may take a few minutes.
Then connect to the box as user vagrant via SSH, change to the folder of the cloned project and execute the initialization script once:
vagrant ssh
cd /var/www/t3o
./t3o.sh init
Now all dependencies of the project are installed via composer and the database contents are pulled. Some user entries must be made in the process:
You can then view the result directly at https://local.typo3.org/.
Attention: The browser displays a certificate error - the page must be approved as an exception. The new typo3.org start page should now be visible.
To actually make changes to the project and transfer them to the central git repository, they must first be made locally. Using PhpStorm as an example, the following explains how you can conveniently work with an IDE and the box.
So far, the project code has been stored in the downloaded Vagrant box on the one hand and somewhere locally on your computer on the other - where you have run git clone. We prefer to work on the local copy, but the browser accesses the code in the box. We therefore need a way to synchronize the local files with the box files as easily and automatically as possible. To do this, we use PhpStorm's deployment option so that changes made locally in PhpStorm are automatically uploaded to Box.
To set up the deployment once, the following steps are necessary:
1. Open the main folder of the cloned project in PhpStorm (i.e. typo3.org)
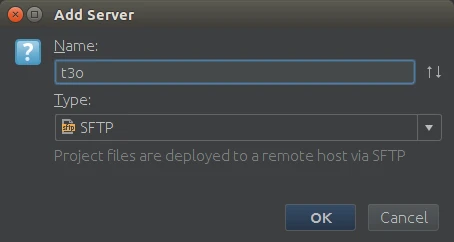
2. Set the configuration as shown in the following screenshot.
If you do not know the path to your private key, execute "vagrant ssh-config | grep IdentityFile | awk '{print $2}'" in the console of your choice and copy the output result into the corresponding field.
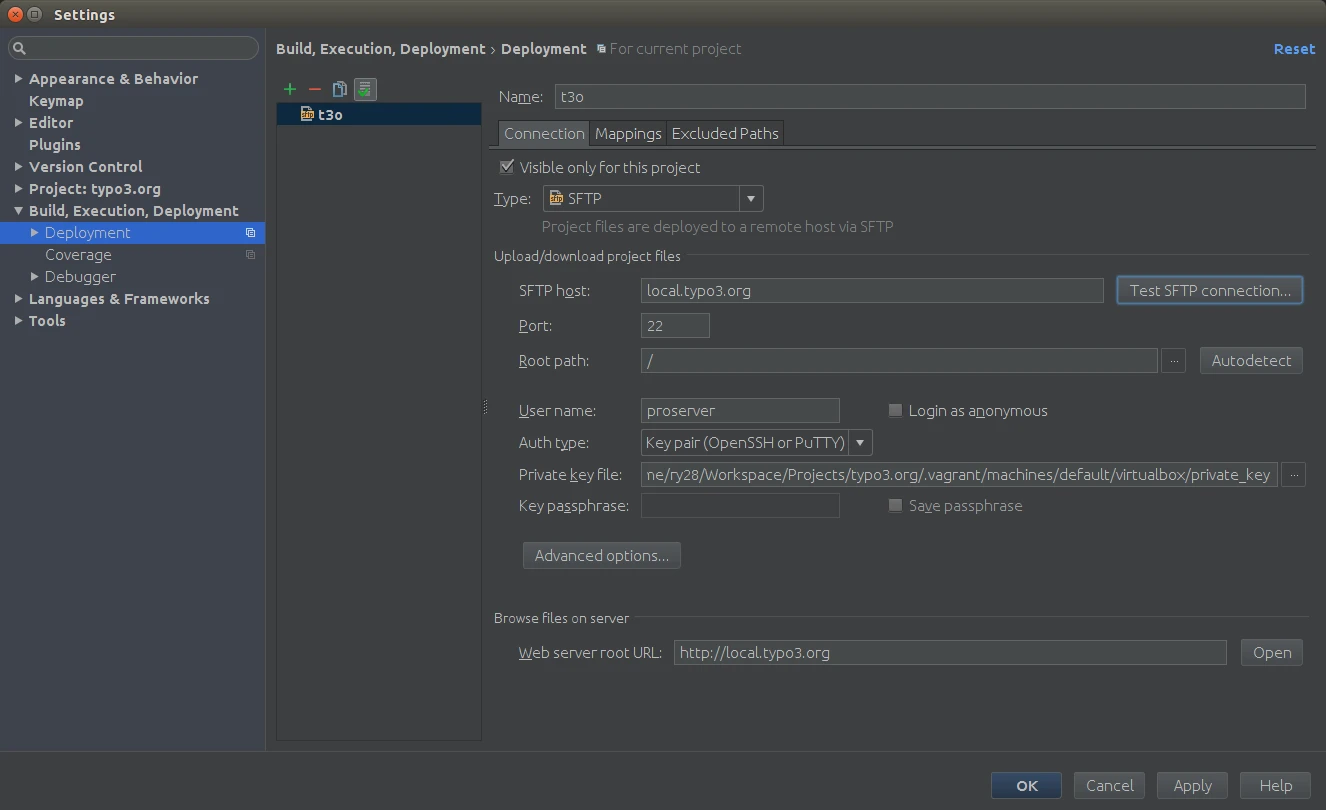
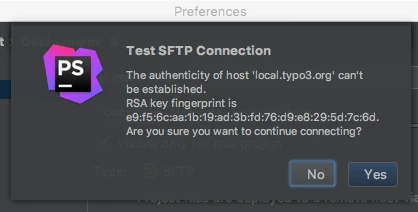
And test the SFTP connection ("Test SFTP connection" button) and accept the connection with "Yes" in the popup.
3. Switch to the "Mappings" tab and adjust the deployment path according to the screenshot

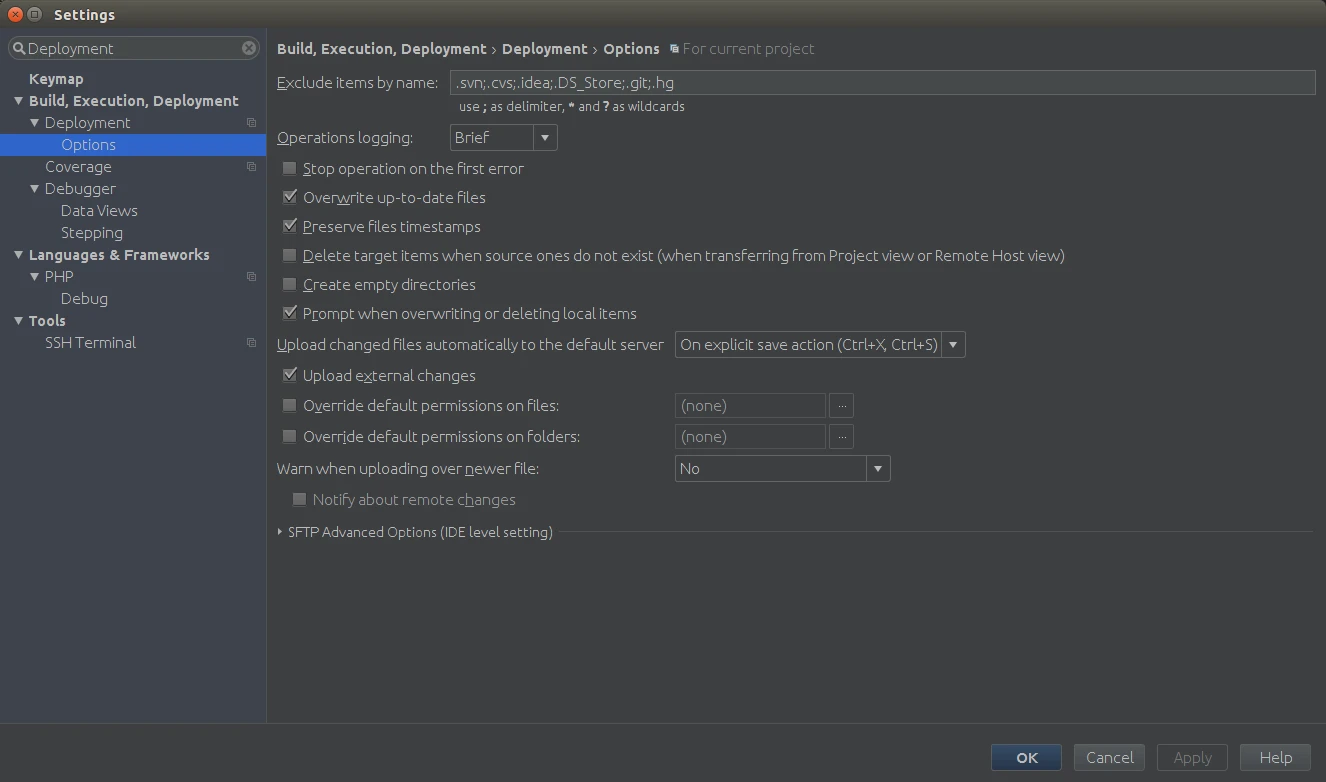
4. Adjust the options for synchronization (Deployment > Options).
The screenshot shows a possible setting. It is particularly important to check "Upload external changes" - this means that changes made by grunt are also recognized when it is executed in the IDE.
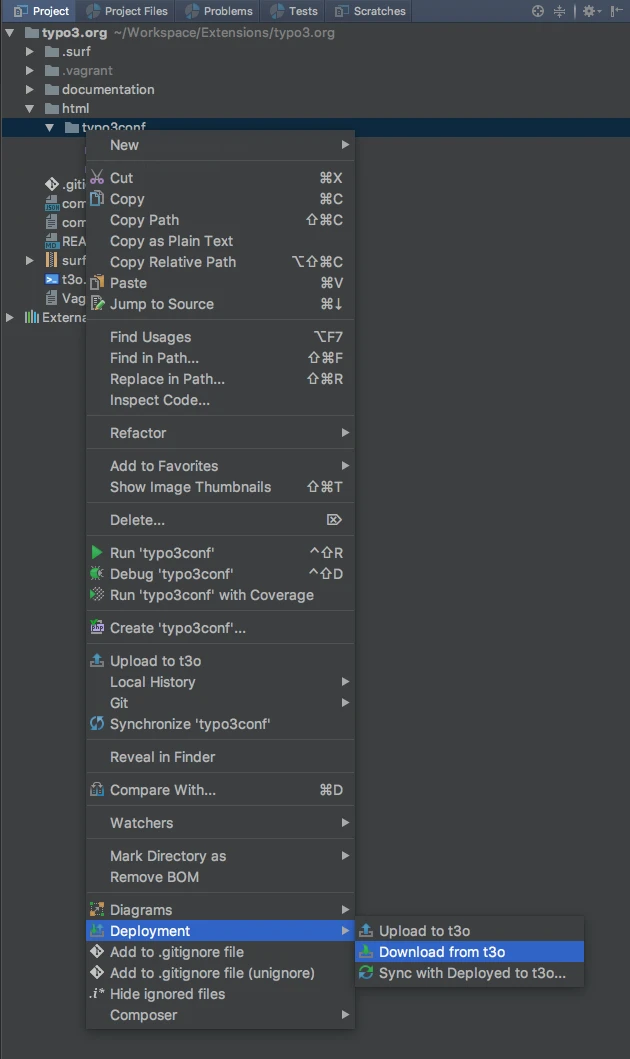
5. Copy the files added by composer from the box once to your local computer
Then confirm that you want to overwrite local files (Download from t3o). Apart from LocalConfiguration.php and PackageStates.php, you should not have any local files in this folder.
(!) Warnings for files in ..../node-modules/..../.bin can be safely ignored.
The project uses composer to install extensions, in particular for the t3olayout extension. For the build process of CSS and JavaScript, grunt is used. We recommend running both composer and grunt in the box so that no version-related errors occur. The following workflow shows how to make changes in t3olayout:
1. Start grunt watch in your IDE or the console in the box (access via SSH)
Console in the box:
cd /var/www/t3o/html/typo3conf/ext/t3olayout/Resources/Private
./node_modules/grunt-cli/bin/grunt watch
2. Change a file
e.g. typo3.org/html/typo3conf/ext/t3olayout/Resources/Private/SASS/ Base/_colors.scss and save. Now grunt should recognize the changes and rebuild the main.css file. The changes should also be visible in the browser after reloading the page.
SSH access as user "proserver"
Go to the main folder of the project:
cd irgendein/Pfad/typo3.org/Find the path to the private key:
vagrant ssh-config | grep IdentityFile | awk '{print $2}'If the call does not work:
vagrant ssh-config( use the path after "IdentityFile" in this output)
Access to the box via SSH:
ssh -A -i /path/to/private_key proserver@local.typo3.org3. Transfer your changes in the extension to the central git repository:
In the box:
cd /var/www/t3o/html/typo3conf/ext/t3olayout
git commit
git push
Local:
Adjust the deployment options in PhpStorm so that .git is also synchronized and work in the same folder as on the box.
4. Run the following in the box in the project's main folder: "composer update t3o/t3olayout". This will pull the latest version of the extension repository in the main project and save the corresponding git commit in the composer.lock file on the box.
5. Copy the composer.lock file from the box to the local project: Option "Download from t3o" (see screenshot at point 5 in the upper part).
6. Transfer the composer.lock main project file to the central repository on gitlab using git commit and git push.
Congratulations, now you can actively participate in the development of typo3.org.
P.S. After you have pushed changes to the master, they can only be approved by Thomas Löffler and Joachim Mathes and transferred to the server.
Have fun trying them out!