Cancel
Start searching
This search is based on elasticsearch and can look through several thousand pages in miliseconds.
Learn more

With the Neos Form Framework, which is already installed in the Neos basic installation, simple contact forms as well as complex, multi-page forms with validations can be implemented. It also offers various extension points for customization.
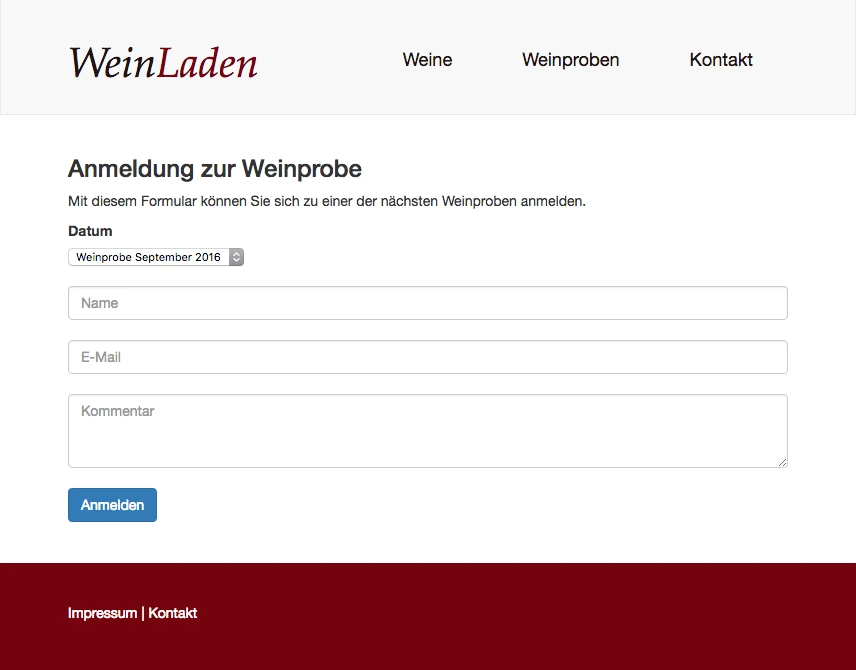
In this part of the workshop, I will show - in line with the previous topic - how a form for booking a wine tasting can be implemented with the Form Framework. This part of the workshop also builds on the previous parts. As always, the complete overview of the code required for this can be found in the Github repository for the workshop.
The following parts of the Neos workshop have already been published. The page developed in parts 1 - 3 serves as the basis for this workshop part:
Forms are configured using YAML files. Each form definition consists of the following parts:
To define our form, we create a new file registration-form.yaml in a directory to be created, Resources/Private/Form/.
The definition of the form begins with the general information, such as the unique identifier and a descriptive name.
This is followed by the definition of the elements to be rendered, which can be nested. So-called container elements can be used to structure the form. The container elements then contain the actual form fields.
The topmost "renderable" defines the page of the form with the structuring type Neos.Form:Page. The page in turn has its own "renderables" section with which the next level of elements - in our case the form fields directly - are defined.
In the example, simple text fields are used for name and email, a multi-line field for the comment and a select field for selecting the event. Each element requires a unique identifier, which can also be used later to access the user input. Further options are also available for configuring the fields.
By specifying validators, mandatory fields can be defined and user entries can be checked. In the example, we use the validator Neos.Flow:NotEmpty to define mandatory fields. The Neos.Flow:EmailAddress validator checks the input for a correct address.
type: 'Neos.Form:Form'
identifier: 'registration-form'
label: 'Anmeldung zur Weinprobe'
renderingOptions:
  submitButtonLabel: 'Anmelden'
renderables:
  -
    type: 'Neos.Form:Page'
    identifier: 'registration'
    renderables:
      -
        type: 'Neos.Form:SingleSelectDropdown'
        identifier: 'date'
        label: 'Datum'
        properties:
          options:
            'September 2016': 'Weinprobe September 2016'
            'Oktober 2016': 'Weinprobe Oktober 2016'
            'November 2016': 'Weinprobe November 2016'
      -
        type: 'Neos.Form:SingleLineText'
        identifier: 'name'
        validators:
          - identifier: 'Neos.Flow:NotEmpty'
        properties:
          placeholder: 'Name'
      -
        type: 'Neos.Form:SingleLineText'
        identifier: 'email'
        validators:
          - identifier: 'Neos.Flow:NotEmpty'
          - identifier: 'Neos.Flow:EmailAddress'
        properties:
          placeholder: 'E-Mail'
      -
        type: 'Neos.Form:MultiLineText'
        identifier: 'comment'
        properties:
          placeholder: 'Kommentar'
          rows: '3'
Formular Definition in Resources/Private/Form/registration-form.yaml
In addition to the fields used in the example, many other elements and validators are defined in the Form Framework and can be used directly.
Structural elements
| Type | Type Description |
|---|---|
| Neos.Form:Page | A form page, a multi-page form is possible. |
| Neos.Form:Section | Section within a form page. |
Special input fields
| Type | Type Description |
|---|---|
| Neos.Form:DatePicker | One form page, a multi-page form is possible. |
| Neos.Form:FileUpload | Section within a form page. |
| Neos.Form:StaticText | Output of a static text. |
Standard input fields
| Type | Type Description |
|---|---|
| Neos.Form:SingleLineText | Simple text field. |
Neos.Form:Password Neos.Form:PasswordWithConfirmation | Simple password entry. Password entry with confirmation field. |
| Neos.Form:MultiLineText | Multiline text. |
| Neos.Form:Checkbox | Single checkbox field. |
| Neos.Form:SingleSelectDropdown | Dropdown field. |
| Neos.Form:SingleSelectRadiobuttons | Radio button. |
| Neos.Form:MultipleSelectDropdown | Select list for multiple selection. |
| Type | Type Description |
|---|---|
| Neos.Flow:NotEmpty | Field must not be empty. This defines a mandatory field. |
| Neos.Flow:DateTimeRange | The earliestDate and latestDate options are used to define the valid time period. |
| Neos.Flow:Alphanumeric | Alphanumeric characters can be used. |
| Neos.Flow:Text | Text does not contain XML tags. |
| Neos.Flow:StringLength | The minimum and maximum options can be used to specify the required length limit. |
| Neos.Flow:EmailAddress | Validates for a correct email address. |
| Neos.Flow:Integer | Checks for integer. |
| Neos.Flow:Float | Checks for a valid float number. |
| Neos.Flow:NumberRange | Checks for an integer in a valid range, which is specified with the minimum and maximum options. |
| Neos.Flow:RegularExpression | Checks against a regular expression from the regularExpression option. |
With the above configuration, the form can already be integrated on the page. To do this, the storage path of the forms must be changed so that the form configurations are searched for in our own site package. Under Configuration in our site package, we create a Settings.yaml and insert the following configuration:
Neos:
  Form:
    yamlPersistenceManager:
      savePath: 'resource://WL.WeinLaden/Private/Form/'
Configuration/Settings.yaml
In addition, our form must be added as an option in the Neos form NodeType so that it can be selected in the inspector.
'Neos.NodeTypes:Form':
  properties:
    formIdentifier:
      ui:
        inspector:
          editorOptions:
            values:
              'registration-form':
                label: 'Anmeldung zur Weinprobe'
Configuration/NodeTypes.yaml
Finisher defines what should happen to the form data after it has been sent. The two finishers are defined in the same file as all other form details.
With the Neos.Form:Confirmation we specify the text that is displayed instead of the form after the form has been successfully submitted. In the text, which we define with the message option, we can also use information from the user.
The second finisher of type Neos.Form:Email then sends the form entries by email. To use this finisher, the PHP package "SwiftMailer" must also be installed - this step is explained in the next section.
All important details of the email, such as destination and sender address and subject, can be transferred directly to the finisher via options. The actual email text is kept in a separate file so as not to unnecessarily bloat the YAML file. In this example, we send a plain text e-mail whose content is read from the Resources/Private/Templates/Mail/Registration.txt file.
finishers:
  -
    identifier: 'Neos.Form:Confirmation'
    options:
      message: >
        <h3>Vielen Dank für Ihre Anmeldung!</h3>
        <p>Wir freuen uns, Sie bei unserer Weinprobe im {formState.formValues.date} begrüßen zu dürfen.</p>
        <p>Ihr Weinladen Team</p>
  -
    identifier: 'Neos.Form:Email'
    options:
      templatePathAndFilename: 'resource://WL.Weinladen/Private/Templates/Mail/Registration.txt'
      subject: 'Neue Anmeldung zur Weinprobe'
      recipientAddress: 'anmeldung@weinladen'
      recipientName: 'Weinladen'
      senderAddress: 'no-reply@weinladen'
      senderName: '{name}'
      replyToAddress: 'no-reply@weinladen'
      format: 'plaintext'
Die konfigurierten Finisher in Resources/Private/Form/registration-form.yaml verarbeiten die Formulardaten.
Hallo liebes Weinladen Team,

eben ging eine neue Anmeldung für die Weinprobe im {form.formState.formValues.date} ein:

Name:     {form.formState.formValues.name}
E-Mail:   {form.formState.formValues.email}
Kommentar:{form.formState.formValues.comment}

Viele Grüße
Definition des Mailtextes in Resources/Private/Templates/Mail/Registration.txt
In addition to the finishers used above, the Form Framework provides further options for processing the form data. Of course, you can also create your own classes and use them for processing at this point.
| Type | Type Description |
|---|---|
| Neos.Form:Confirmation | Displays a configurable text after sending. |
| Neos.Form:Email | Sends an email with the content of the submitted form. |
| Neos.Form:FlashMessage | Displays any flash message after sending. |
| Neos.Form:Redirect | Redirects the input to a controller from any other package after sending. |
The e-mail finisher uses the PHP package SwiftMailer to send e-mails. This package must be installed via composer. In the Neos Box in the directory /var/www we add this package to the existing installation with the following command:
composer require neos/swiftmailer:6.0.0During the development phase, however, it is quite impractical to actually send emails. This is because you always have to wait for the mail client to send and retrieve the content to check it.
It is easier to save the email locally. To do this, we configure the Swiftmailer to store the email content in a local file in MBox format. As this should only happen in the development context, but of course not in live operation, we make this setting in a new file under Configuration/Development/Settings.yaml:
Neos:
  SwiftMailer:
    transport:
      type: 'Neos\SwiftMailer\Transport\MboxTransport'
      options:
        mboxPathAndFilename: '%FLOW_PATH_DATA%/last-mail.mbox'
Configuration/Development/Settings.yaml
The e-mail can now be read directly after sending in the file /var/www/Data/last-mail.mbox. For example with the "cat" command:
cat /var/www/Data/last-mail.mboxAnzeigen der generierten E-Mail in der Entwicklerbox
I hope this workshop part was able to show you how to easily create forms with the Neos Form Framework. As always, you can find all the necessary code on our github repository. A currently still somewhat rudimentary, but constantly expanding documentation can also be found on ReadTheDocs. If you have any questions or comments about this tutorial, please use the comment field below.